3. YOLO Training
Here, we discuss and show how to use the exported artifacts from IAIA with darkflow and darknet. Make sure you have followed the instructions to install these programs. Note that you do not need both; one will suffice. The output artifacts of IAIA may be used for either.
In the examples below, we have exported our project to the folder /home/super/tmp.
3.1. darkflow
The training file for darkflow, darkflow-train.sh, will have the following content.
flow --model /home/super/tmp/tiny-yolo-voc-tmp.cfg \
  --load bin/tiny-yolo-voc.weights \
  --labels /home/super/tmp/tmp_labels.txt  \
  --train \
  --annotation /home/super/tmp/annots \
  --dataset /home/super/tmp/images \
  --gpu 1.0
The test file for darkflow, darkflow-test.sh, will have the following content.
flow --model /home/super/tmp/tiny-yolo-voc-tmp.cfg \
 --imgdir /home/super/tmp/images \
 --labels /home/super/tmp/tmp_labels.txt \
 --gpu 1.0 \
 --load -1
The easiest thing to do is to go into your darkflow root directory and copy and paste the contents of these generated file from the darkflow root directory. Note that the learned weights be be placed in the directory darkflow/ckpt.
3.2. darknet
The training file for darknet, darknet-train.sh, will have the following content.
./darknet detector train \
   /home/super/tmp/tmp.data \
   /home/super/tmp/yolov3-tiny-tmp.cfg
The test file for darknet, darknet-train.sh, will have the following content.
./darknet detector \
   test \
   /home/super/tmp/tmp.data \
   /home/super/tmp/yolov3-tiny-tmp.cfg \
   backup/yolov3-tiny-tmp_final.weights
The easiest thing to do is to go into your darknet root directory and copy and paste the contents of these generated file from the darknet root directory. Note that the learned weights be be placed in the directory darkflow/backup.
It is VERY IMPORTANT that when you run the testing command for darknet that you modify the cfg file. In this example, you must modify the [net] section of /home/super/tmp/yolov3-tiny-tmp.cfg. During training, this section looks like the following. Note that batch=16 and subdivision=1.
[net]
# Testing
# batch=1
# subdivisions=1
# Training
batch=16
subdivisions=2
width=416
height=416
channels=3
momentum=0.9
decay=0.0005
angle=0
saturation = 1.5
exposure = 1.5
hue=.1
During testing, this section should be modified to look like the following. Note that batch=1 and subdivision=1. Also note that the modification is simply commenting out two lines and uncommenting two other lines. If you do not change the batch and subdivision values to 1 and 1, you will not get any appropriate object detection.
[net]
# Testing
batch=1
subdivisions=1
# Training
# batch=16
# subdivisions=2
width=416
height=416
channels=3
momentum=0.9
decay=0.0005
angle=0
saturation = 1.5
exposure = 1.5
hue=.1
3.3. Complete End-to-End Example
The proof is in the pudding, and so we have created an example on github iaia-polygons. This github project stores ready-to-train data, as exported by IAIA, for darkflow and darknet. The object detection is very simple: detect polygons. As such, we generated 8 types of polygons (3 sided to 10 sided, or triangle to decagon), randomly rotated these polygons, and randomly placed them in a 500 x 500 JPG file. We then use darkflow and darknet to learn YOLO object detection models. For the impatient, below is a video going through these images and showing the object detection results of darkflow.
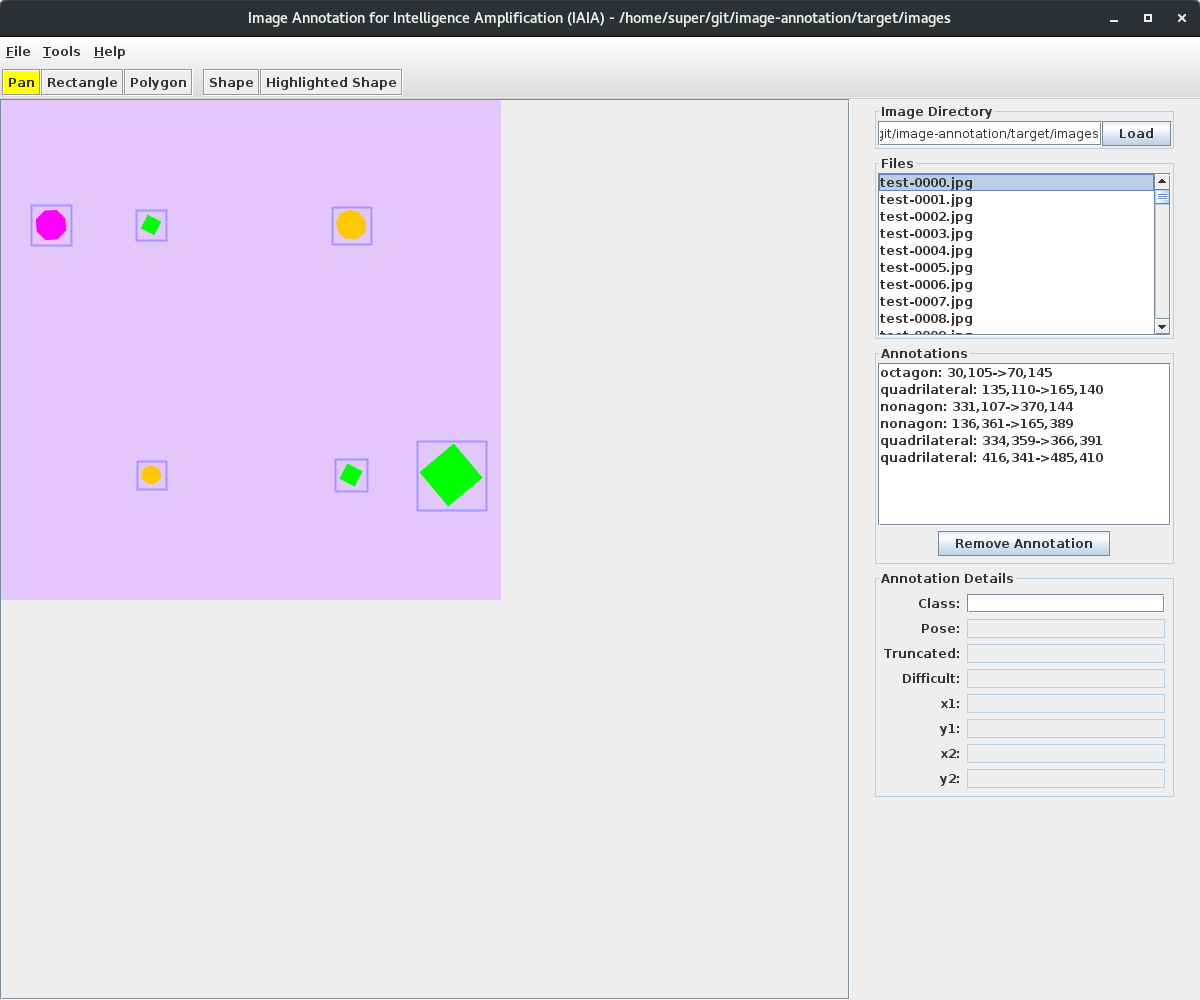
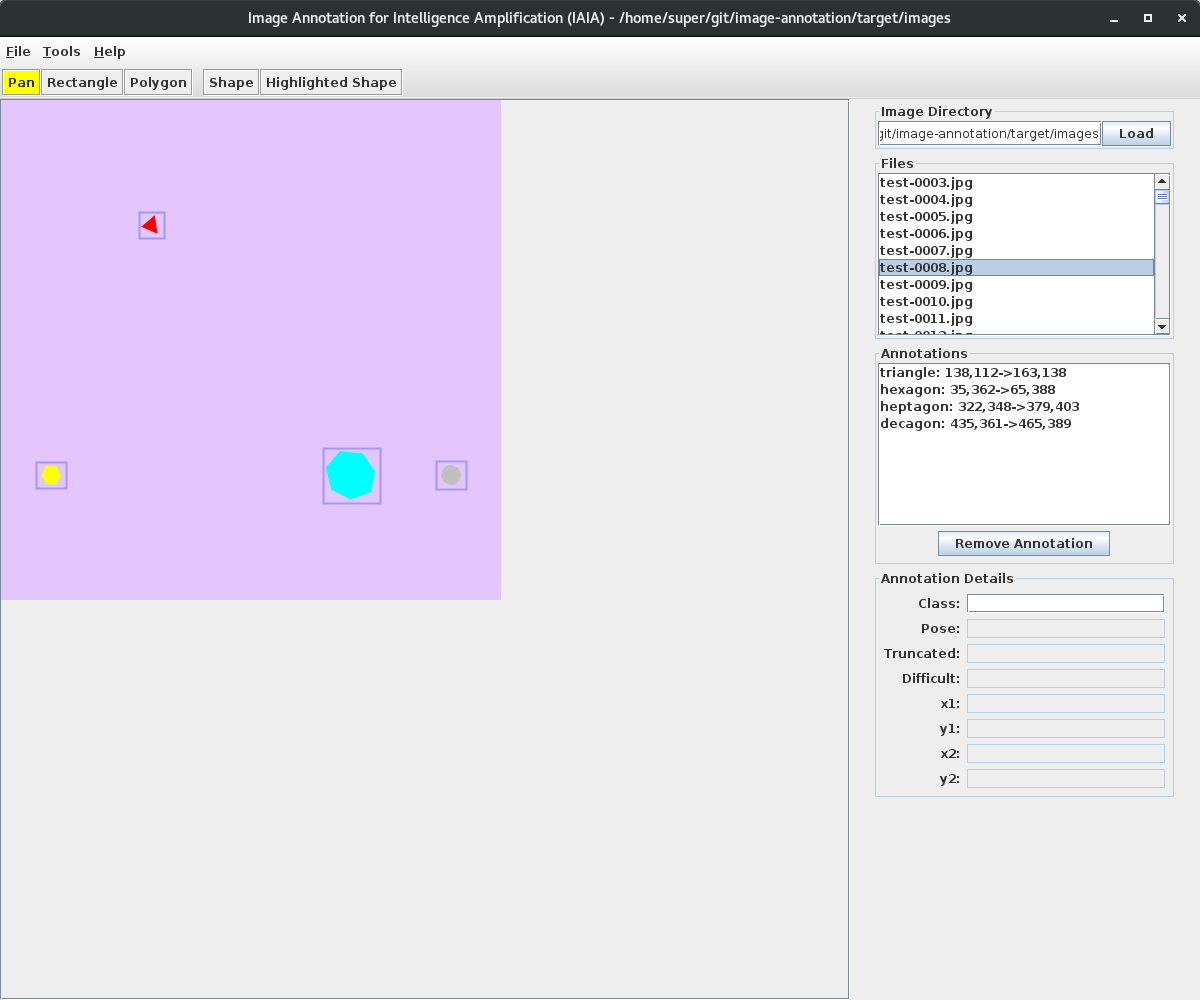
Some examples of the generated images and annotations using IAIA are shown below.


First, we need to clone the repository. Note that we must clone the repository in /tmp/iaia-polygons since both darknet requires specification of where the file exists (darkflow does not have this requirement).
cd /tmp
git clone https://github.com/oneoffcoder/iaia-polygons.git
Then we need to navigate to where we installed darkflow.
cd /path/to/darkflow
Training starts by typing in the following. Note that IAIA generates this in the file darkflow-train.sh. Additionally, we have specified the use of GPU. Lastly, the training was not allowed to completion as we stopped at the 64th epoch (you could break out earlier too).
flow --model /tmp/iaia-polygons/tiny-yolo-voc-iaia-polygons.cfg \
    --load bin/tiny-yolo-voc.weights \
    --labels /tmp/iaia-polygons/iaia-polygons_labels.txt  \
    --train \
    --annotation /tmp/iaia-polygons/annots \
    --dataset /tmp/iaia-polygons/images \
    --gpu 1.0
Testing starts by typing in the following. Note that IAIA generates this in the file darkflow-test.sh.
flow --model /tmp/iaia-polygons/tiny-yolo-voc-iaia-polygons.cfg \
   --imgdir /tmp/iaia-polygons/images \
   --labels /tmp/iaia-polygons/iaia-polygons_labels.txt \
   --gpu 1.0 \
   --load -1
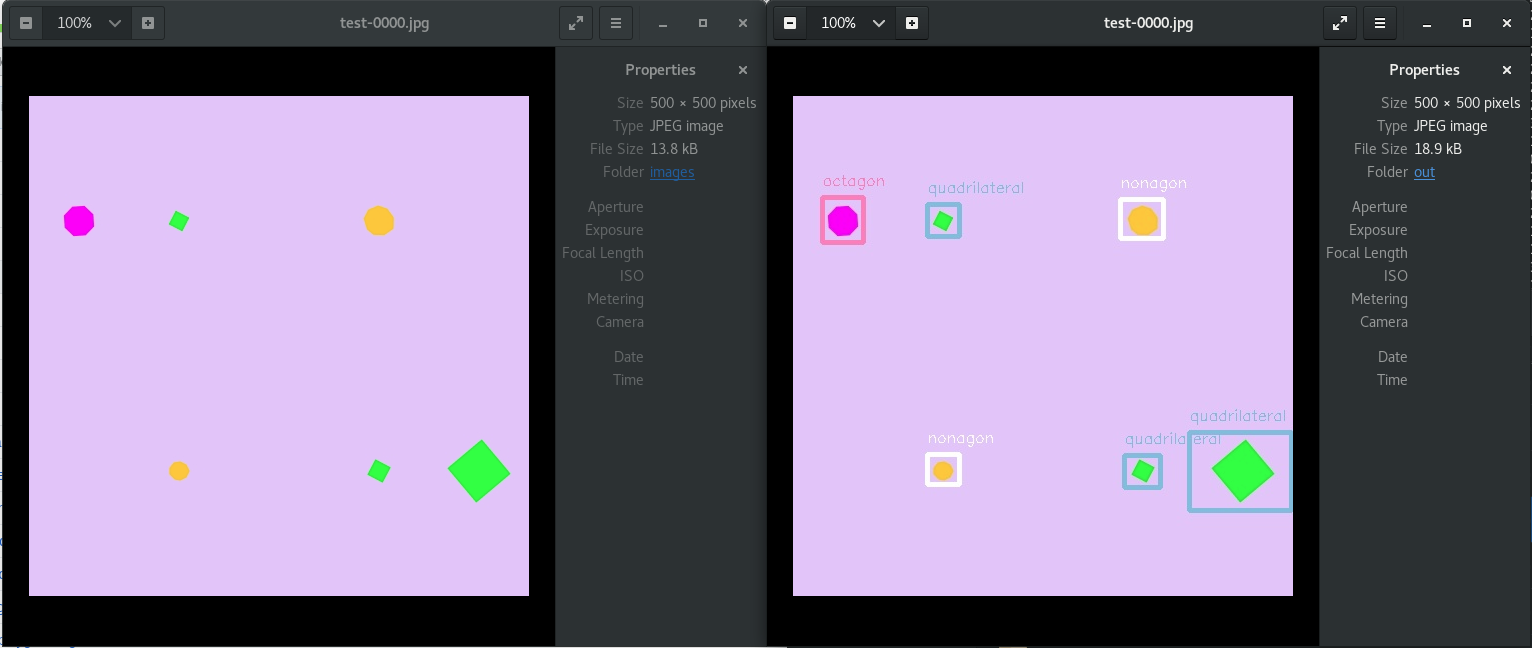
The visually annotated files will be placed in /tmp/iaia-polygons/images/out. Here is a side-by-side comparison of the original image and the one produced by darkflow showing the detected objects.

We can also use darknet, and so we navigate to where we installed darknet.
cd /path/to/darknet
Training starts by typing in the following. Note that IAIA generates this in the file darknet-train.sh.
./darknet detector train \
   /tmp/iaia-polygons/iaia-polygons.data \
   /tmp/iaia-polygons/yolov3-tiny-iaia-polygons.cfg
Testing starts by typing in the following. Note that IAIA generates this in the file darknet-test.sh. Again, you need to modify yolov3-tiny-iaia-polygons.cfg by setting batch=1 and subdivision=1 before testing.
./darknet detector \
    test \
    /tmp/iaia-polygons/iaia-polygons.data \
    /tmp/iaia-polygons/yolov3-tiny-iaia-polygons.cfg \
    backup/yolov3-tiny-iaia-polygons_final.weights
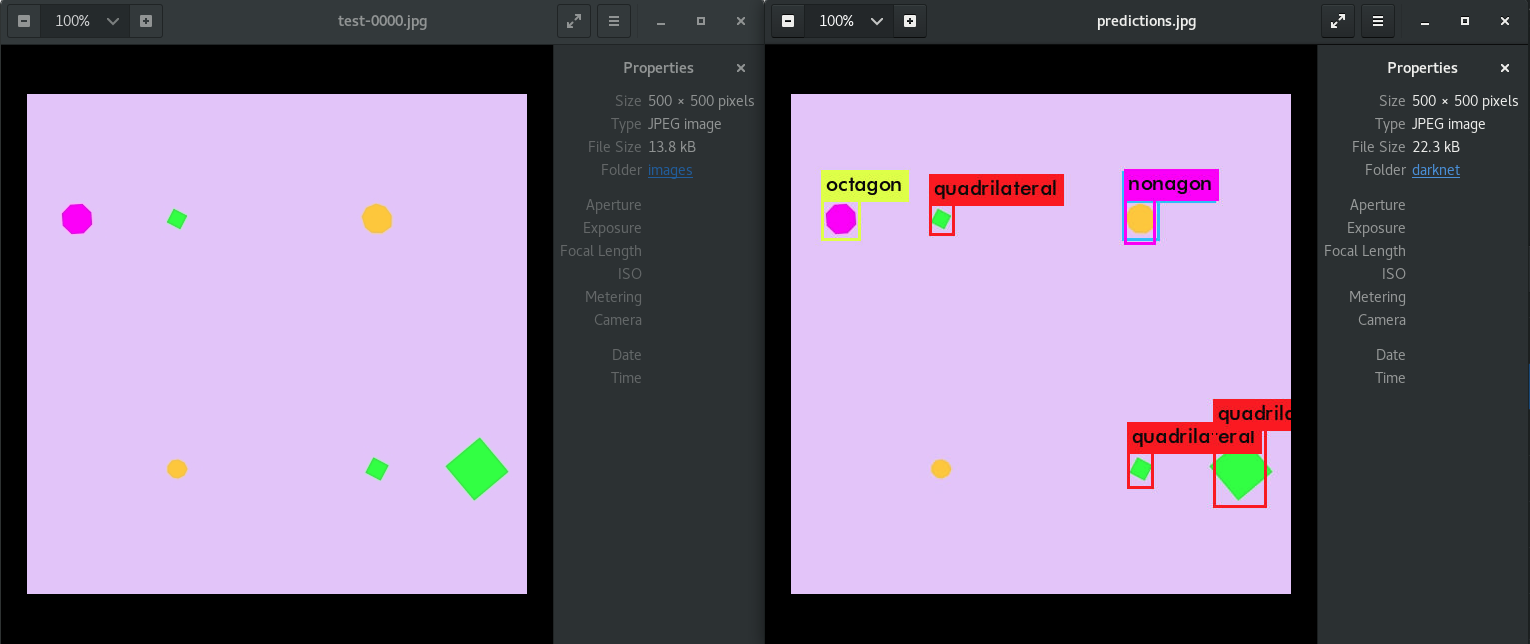
Unlike darkflow, when testing with darknet, you must supply the path to a file to have object detection applied to one-at-a-time. Some examples that you may use are as follows. Note that you may look at iaia-polygons_valid.txt to get more file paths.
For comparison, here’s what darknet detected for test-0000.jpg. Note that the bottom left-ish nonagon was not detected as an object with darknet, but darkflow was able to detect it. The issue here is that yolov3-tiny-iaia-polygons.cfg specified less training cycles.
